SCANOLOGY has just introduced NimbleTrack Gen2. With upgraded technology, SCANOLOGY's NimbleTrack Gen2 is capable of scanning large and complex areas significantly faster, while maintaining measurement-level accuracy. This is the next generation of the company's mobile optical tracking and 3D scanning systems. SCANOLOGY's NimbleTrack Gen2 is designed to deliver higher performance, especially in speed and measurement range.

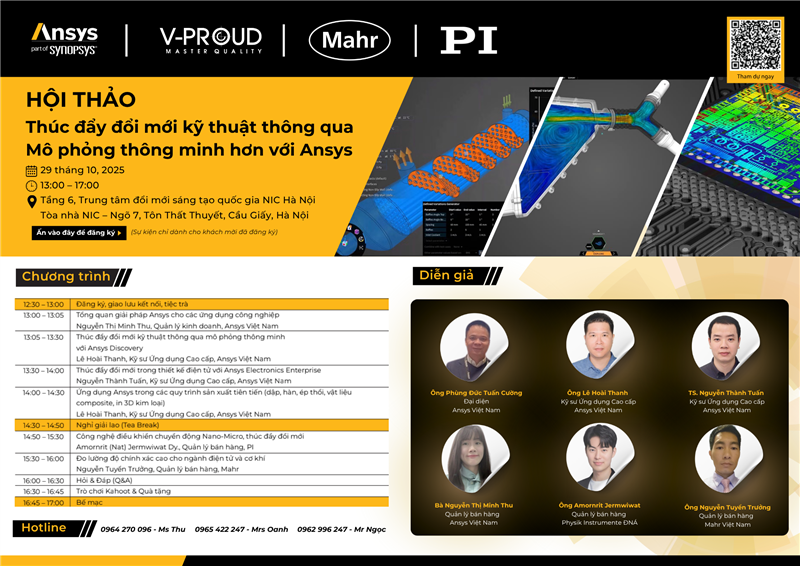
A breakthrough opportunity for R&D processes awaits the Vietnamese engineering community. The specialized workshop "Driving Engineering Innovation Through Smart Simulation" organized by ANSYS will take place on October 29, 2025, at the Innovation Hub Building, updating the latest advanced simulation solutions for the manufacturing, electronics design, and Nano-Micro industries.

In the global race to automate manufacturing, China is emerging as a pioneer with the “dark factory” model – where robots and artificial intelligence completely replace humans. Requiring no light or rest, the new generation of factories operate continuously 24/7 with superior precision and efficiency.
Coordinate Measuring Machine (CMM) sensors continues to evolve allowing more complex part geometries and applications to be measured with increased accuracy.
.jpg)
The CMM remains an integral tool in the inspection room of most manufacturing companies. In this article we look as some of the sensor developments that continue to expand CMM versatility and their adaption to the latest manufacturing trends and techniques.
.jpg)
Motorized Probe Head
After its invention by Renishaw, over 35 years ago, the motorized probe head provided a significant leap in CMM flexibility negating the need for an array of fixed probes and styli customized to match the requirements of the part undergoing inspection. Originally incorporating a fixed index mechanism, allowing motion in both A and B angles in 7.5 degree increments, over past years the angle of index has been reduced and a new generation of infinite position heads have also evolved. In addition recent models of indexing heads have been released that offer inferred calibration meaning that each commanded probe position, within an inspection routine, no longer needs be calibrated. While calibration times are relatively short in duration for CMM touch trigger probes they can be extensive when using analogue scanning probes on motorized probes heads. The latest Renishaw PH10M-i. Q PLUS undergoes an error mapping process before shipment that creates a unique calibration map that is saved to the head file. The ability to automatically orientate the head to the exact normal vector of the feature to be measured improves CMM measuring performance and minimizes the risk of styli shanking.
Today a wide selection of CMM probe heads are offered from fixed heads, indexing heads to continuous motion heads. The fixed probe head being still used on extremely high accuracy CMMs and is also particularly useful for carrying long extension bars needed to probe and scan deep internal part features.
.png)
The introduction of the Renishaw 5 axis REVO probe head brought about a significant improvement to the functionality of the CMM for the most sophisticated of aerospace and automotive measuring applications. The tactile scanning sensor is seamlessly integrated into the probe head itself with a real-time laser detecting any deflection of the measuring styli and hollow extension bar thereby improving dynamic CMM measuring performance. The unique probing system has ‘canned’ measurement routines whereby features can be scanned with the motion of the REVO probe head performing the scanning rather than the CMM frame.
With the advent of more capable and sophisticated probe heads also came the ability to perform automatic sensor changes within an inspection sequence thereby allowing the optimum sensor to be selected for specific part feature or characteristic measurements. Today almost all CMM OEM’s offer a smorgasbord of sensor technologies including tactile scanning, laser line scanning, optical sensors, surface finish and more.
.png)
The CMM has become a unified measuring station where ‘one size does fit all’ negating the necessity to transfer the part between different measuring technology platforms to produce a complete oversight inspection report. The unified CMM performance reduces overall inspection times, dramatically reduces latency between manufacturing and generation of inspection data while providing all measured part characteristics within a single seamless inspection report.
Some manufacturers have taken the approach even further whereby fixed and motorized probe heads can be quickly swapped out on the CMM providing the necessary compromise between fixed higher accuracy probing and full motorized head flexibility. One example is the Zeiss multi application sensor system (mass) which enables both contact and optical measuring on the same machine. Sensors can be changed out in just a few steps thanks to the common dovetail interface for all sensors. Each of the 9 available ZEISS sensors are equipped with an ID chip which is automatically recognized by the machine when the sensor is installed and selected in the ZEISS CALYPSO measuring software eliminating operating errors.
.png)
Integrated directly into the CMM quill, SENMATION, from Hexagon Manufacturing Intelligence, uses a probe recognition system to quickly identify and check the status of the loaded sensor. With no need to recalibrate after exchange, the system delivers smooth automatic changes for faster measurement sequences. A universal sensor switch and intelligent sensor module mean that SENMATION can accept all common sensor types, while the scalable nature of the system allows additional sensors to be integrated in future.
.png)
The CMM can be called many things but, in basic terms, it’s merely just a sensor carrier – a precision structure that can be commanded to a three-dimensional position in space where-after it is instructed to carry out discrete sensor functions, with or without, additional controlled CMM frame motion.
The CMM remains the most accurate ‘sensor mover’ available to manufacturing quality control and, as a consequence, is as yet unrivalled in terms of accuracy, repeatability and affordability. Its ‘achilleas heel’ however being its inability to seamless integrate directly into manufacturing processes. The CMM also offers slower inspection times compared to faster optical measuring solutions, and the necessity to be programmed feature by feature, rather than just ‘grab all’ and have the metrology software extract feature geometry from ‘grabbed data’ – with final presentation of a complete topographical color map of the measured part allowing rapid analysis.
The uptake of structured light sensors for production measurements has left the CMM behind in the quality control laboratory. The combination of structured light technology, with the virtues of the CMM, seems a logical combined next step in the ever ongoing evolution of the CMM.
.png)
The launch by Renishaw of its REVO RFP structured light sensor represents an initial step in the migration path of the CMM into structured light scanning. The RFP probe is designed for inspection of freeform surfaces and complex geometry, rapidly delivering patches of surface data with high point density. The RFP fringe probe does not require reference markers to stitch data patches together from different scanned areas since this is executed automatically by the REVO system. Automatic exposure compensation ensures optimal data results for different materials, surface colours and textures without the need for matt coatings.
.png)
While laser line scanning has played a huge role in portable metrology, both integrated with portable arm CMMs and as hand held scanners, for both reverse engineering and quality control. Attempts to migrate this technology onto the CMM frame, as a main stream sensor, has struggled to gain wide market penetration. While today, all CMM OEM’s offer laser-line scanners, their uptake remains relatively low as a percentage of annual sales of new CMM units.
With the advent of structure light scanning migrating to the CMM frame one has to question if laser line scanners have lost the opportunity to become a mainstream CMM sensor technology. For sure the inability of CMM software’s to handle generated data initially held this technology back however, today, this is no longer the case and price versus reward appears to be more the limiting factor in customer uptake.
.png)
Several newly introduced CMM sensor innovations has seen application specific functions being addressed. The recent introduction by Hexagon Manufacturing Intelligence of its HP-OW chromatic white-light sensor with the ability to measure components with transparent, polished, rough, and matte finishes and making it easy to quickly and accurately measure parts made with delicate materials is one such example. The ZEISS DotScan offers the capturing of freeform surfaces, also using chromatic white light, for applications especially when styli or camera sensors reach their limits on sensitive, soft, reflective or low-contrast surfaces.
.png)
Renishaw offers the RVP video inspection probe as one of its many REVO sensors where for certain applications, non-contact inspection provides clear advantages over traditional tactile probing techniques. Thin sheet metal parts or components with large numbers of holes, sometimes as small as 0.5 mm, are parts which are not typically suited to tactile measurement.
CMMs continue to adapt to the ever-changing needs of manufacturing through the introduction of new advanced sensors. For sure this an area that will continue to expand the horizons of CMM measurements outside of the quality lab, further enhance CMM measuring capabilities, while also offering the possibility of reducing CMM programming complexity along-side the CMM being adapted for integration directly into manufacturing processes.
As you ‘check-out’ the next CMM measurement report here are the questions for future consideration:
Q1: “Would you like extra capability with your measurement today?”
Q2: “Are you planning to ‘Measure IN’ or ‘Measure OUT’?”
Source: Metrology News
(84) 896 555 247